Case Study
Soft Tissue Grafting + Dental Implants
Restoring function and long‑term health while creating a natural, aesthetic gum contour
How Gabby’s implant success story started
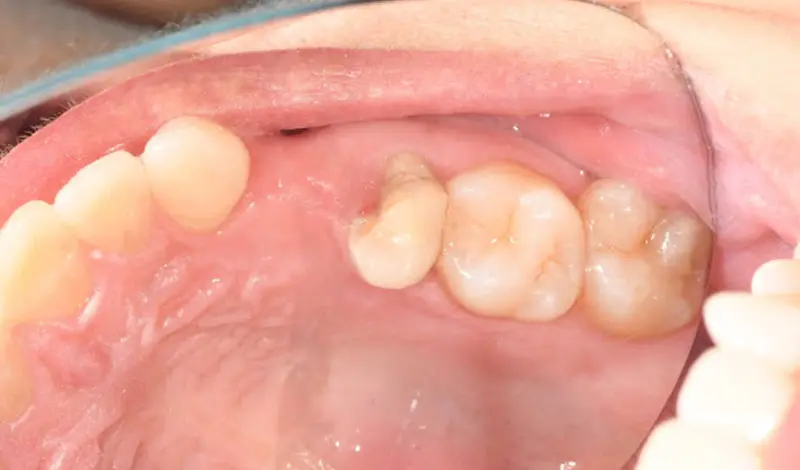
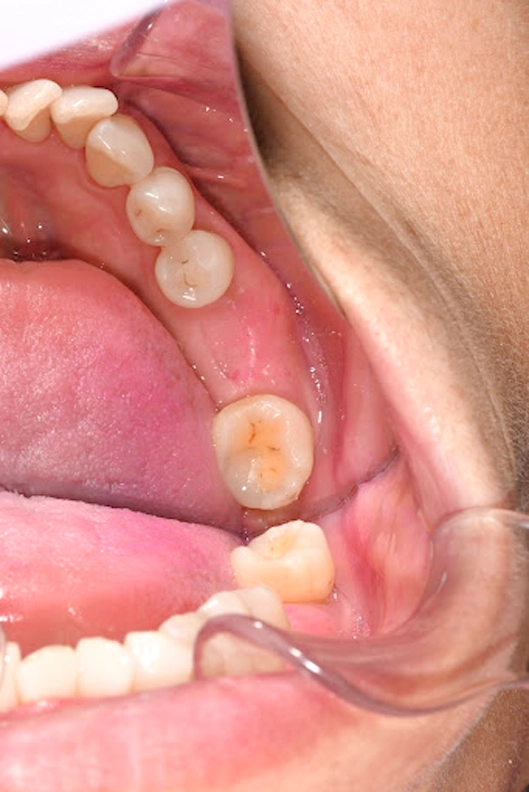
Gabby (not her real name) came to Dental Paradiso concerned about a missing upper left premolar (first bicuspid) with a soft‑tissue defect—the gum there had pulled back and lacked volume. This made the space look sunken, and introduced additional challenges placing a natural‑looking implant restoration. On the same side, her second premolar was chipped and decayed and needed a crown, while her lower left first molar had already been treated with an implant and crown earlier.
Our goals were clear: restore Gabby’s missing tooth and crown the damaged one for function, prevent further damage to neighbouring teeth, and rebuild the gum so the final implant crown would look natural and healthy.
Clinical findings
Upper (L) 1st premolar (missing):
The site showed significant soft-tissue loss, with reduced gum thickness and contour, making it unsuitable to support an ideal cosmetic implant without grafting.
Upper (L) 2nd premolar:
Chipped and decayed tooth structure requiring restoration with a protective crown.
Lower (L) 1st molar:
Already restored with an implant and final crown, both functional and stable.
Treatment plan (what we decided and why)
- Soft tissue grafting + implant at the upper left first premolar site.
- Purpose: rebuild lost gum volume and create a healthy, stable band of tissue around the future implant. A thicker, well‑attached gum helps with hygiene, reduces the risk of recession, and improves the cosmetic result.
- Porcelain crown on the upper left second premolar to restore form and protect the tooth from further decay or breakage.
- Provisional (temporary) crown immediately used to shape the gum (emergence profile) while the graft matures. This is a key step to guide the tissue into a natural contour before the final crown.
- Lower left first molar: The lower left first molar had already been restored with an implant and crown in an earlier stage of treatment. We included it in this case report as a reference point to show the stability and function of her implant work over time.
What we did—step by step
1) Preparation and planning:
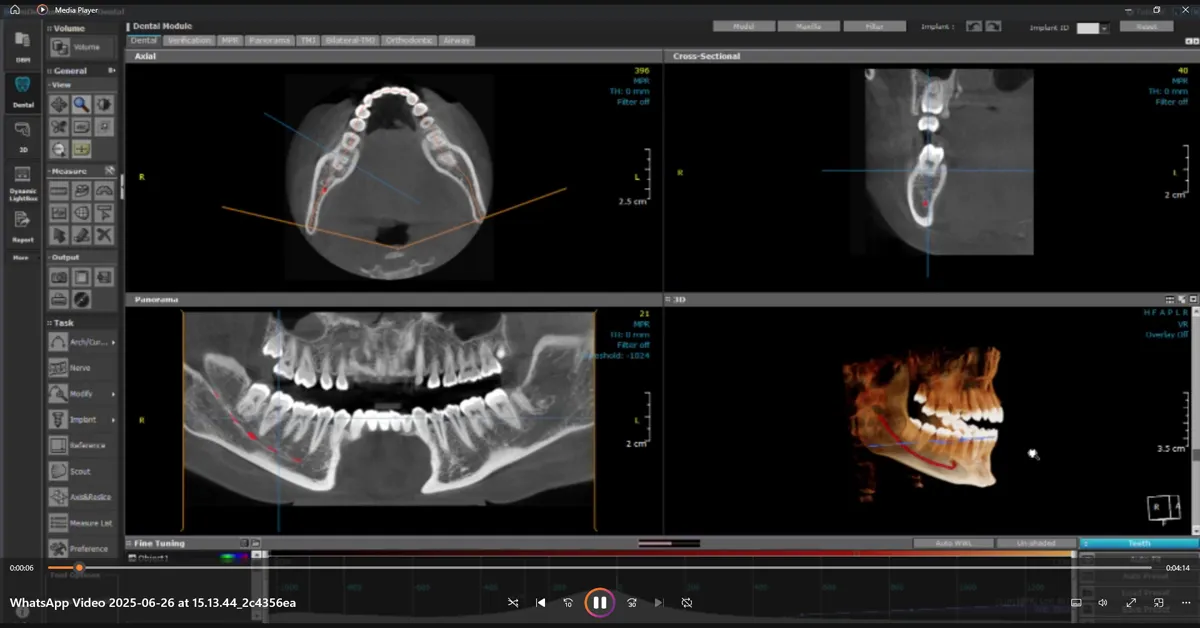
We took clinical photos and CBCT 3D scans to study the gum shape and bone. The team planned where to harvest graft tissue and how the implant and crown would sit for the best long‑term outcome.
2) Restorative work on the neighbouring tooth:
The upper left second premolar was prepared and fitted with a protective porcelain crown to restore the tooth’s strength and appearance.
3) Harvesting the graft (donor site):
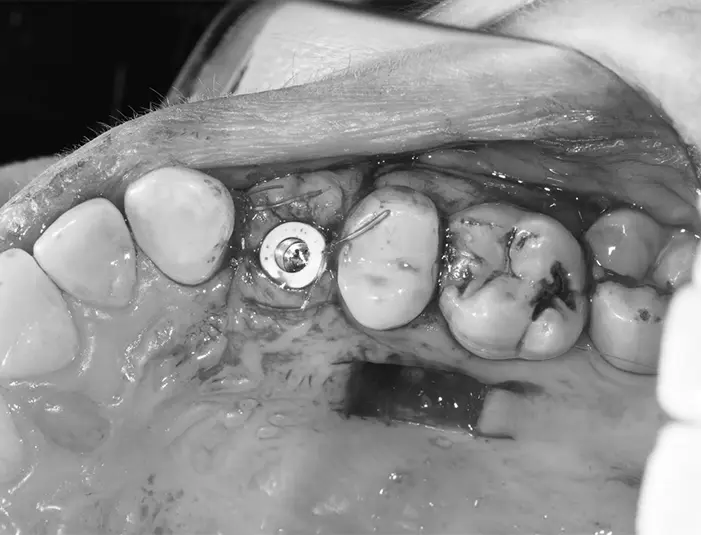
A small amount of tissue was taken from the palate (roof of the mouth). This is a commonly used donor site because the tissue there is a good match for adding thickness to the gum.
The harvest site is carefully sutured and protected—most patients report some soreness for a few days, but heal well with proper care.
4) Placing the graft at the implant site:
The graft was secured into the area of soft‑tissue deficiency to increase thickness and improve the gum contour.
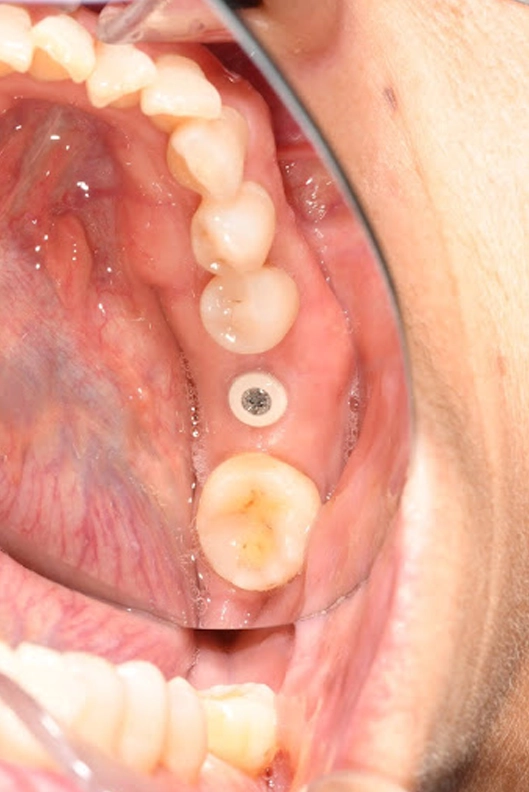
5) Implant placement and provisionalization:
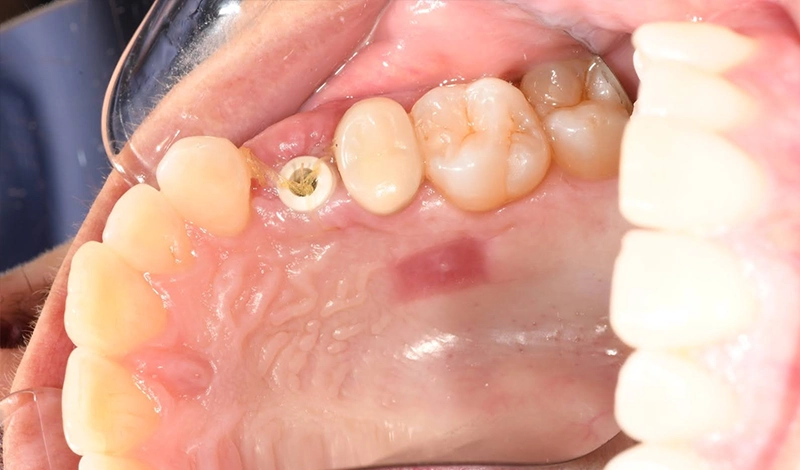
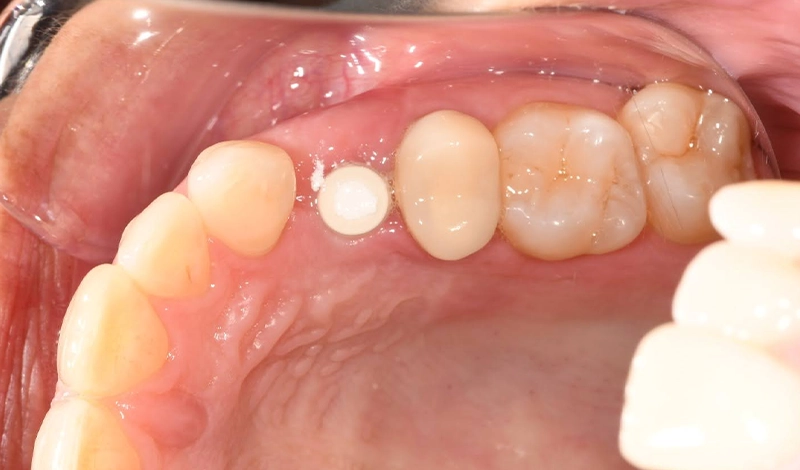
A dental implant post was placed into the jawbone at the missing upper premolar site. A temporary crown/provisional was fitted over the implant. The provisional is shaped so the gum heals around it in a natural, scalloped form—this is the emergence profile.

6) Healing, follow‑ups, and final crown:
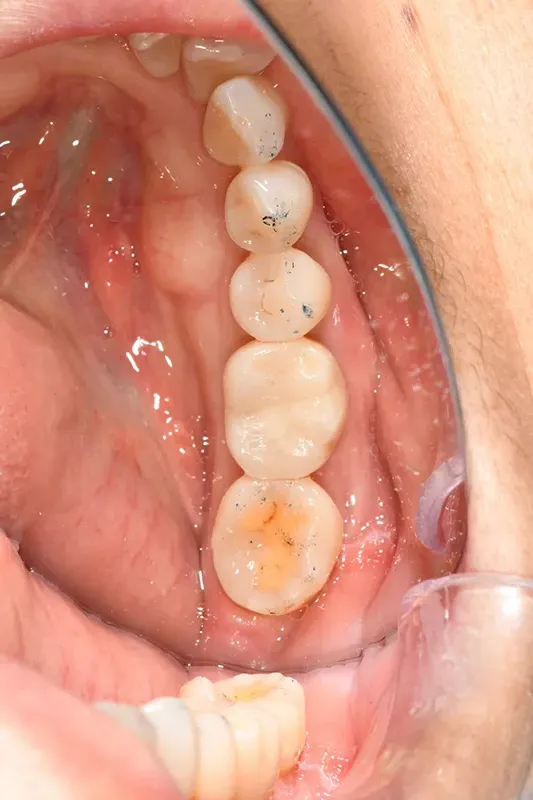
The graft and surrounding tissue were monitored over several weeks to months. Once the gum contour matured and the implant integrated with the bone, the final implant crown was fabricated and delivered with careful attention to colour, shape, and how it meets the gum.


Why the provisional crown matters
A provisional crown is not just a temporary tooth—it’s a sculpting tool. By building the temporary crown with a specific shape, the dentist guides the gum to heal into a natural slope around the implant. That final gum shape (the emergence profile) is what makes an implant crown look like it grows out of the gum like a real tooth.
Timeline & healing (typical expectations)
Initial recovery after graft and implant placement:
The first week is the most sensitive, mild discomfort and swelling are common.
Soft tissue healing:
Most patients notice visible improvement in 2–6 weeks, while the tissue continues to mature and refine over 2–3 months.
Bone integration of the implant:
Osseointegration commonly takes a few months (often 3–4 months) before delivering the final crown, depending on individual healing.
* The exact timing varies by patient—factors like smoking, medical conditions, and oral hygiene can affect healing.
Gabby’s outcome
Following treatment, the clinical objectives were achieved as planned:
- The missing upper left first premolar was replaced with an implant and crown, supported by a soft-tissue graft.
- The grafted gum at the site demonstrates stable contour on review.
- The upper left second premolar has been restored with a porcelain crown.
- Radiographs confirm that both implants (upper premolar and previously restored lower molar) are stable and well-integrated.


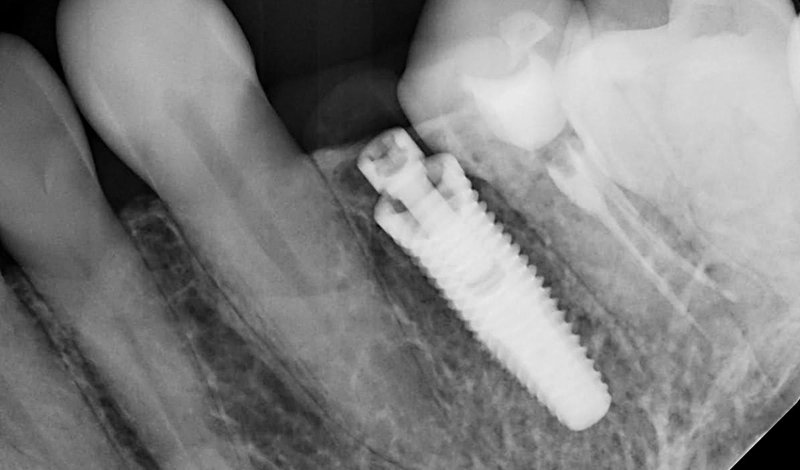
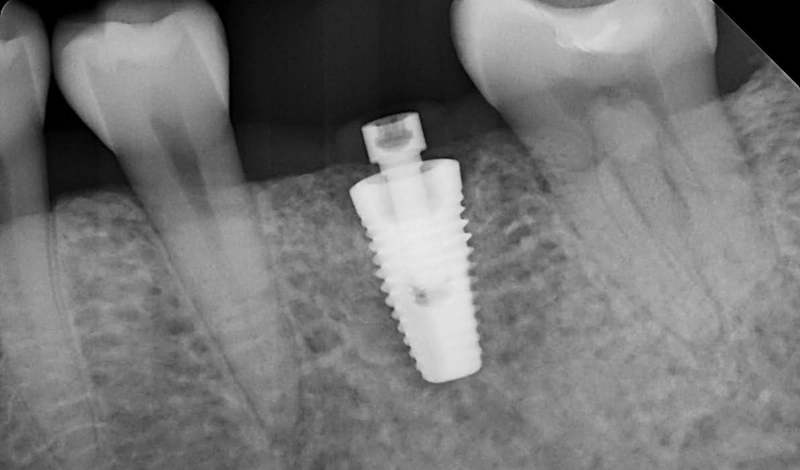
X-ray scans showing both implants placed in the upper premolar and lower molar positions
Summary of implant and soft-tissue grafting
Dr. Elmer Lee and the Dental Paradiso team used a coordinated approach involving soft-tissue grafting, provisional shaping, and implant placement to address gum volume loss and a missing upper premolar. Each stage was carefully planned and sequenced to support tissue stability, implant integration, and restoration of the neighbouring too.
This report is provided as an example of treatment planning. Every patient’s dental condition is unique, and treatment needs, healing times, and outcomes can vary. A personalised assessment by a dental practitioner is essential before determining the most appropriate approach.
Gabby’s Soft Tissue Grafting + Dental Implants
Restoring function and long‑term health while creating a natural, aesthetic gum contour


